Ever felt like you’re shouting into the void, hoping a video will magically turn a skeptical visitor into a paying customer? You’re not alone. SaaS founders and product managers spend countless hours tweaking copy, tweaking UI, and still wonder why the conversion rate sits stubbornly low.
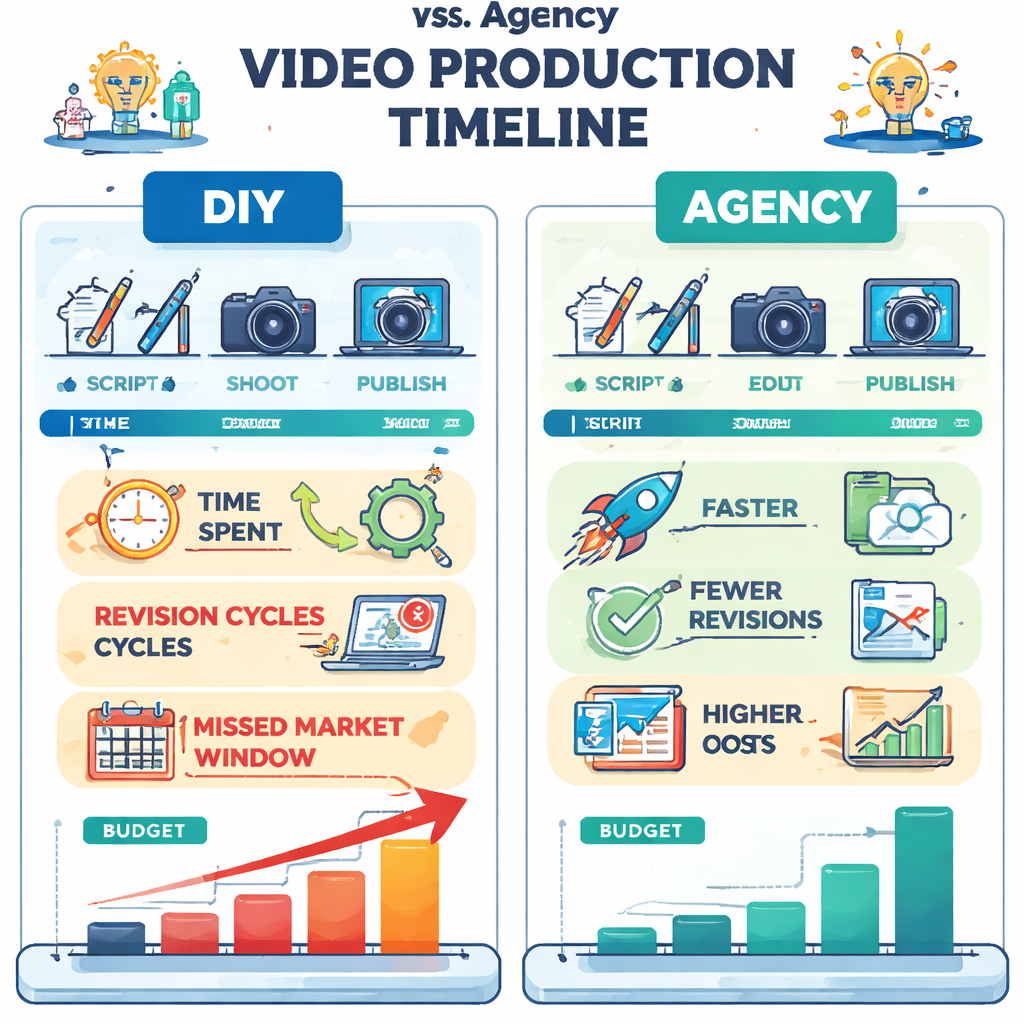
What we’ve seen over the past few years is a pattern: teams pour money into high‑gloss agency productions, get a slick video, and then watch it gather dust because there’s no clear plan for distribution or measurement. The result? A beautiful asset that doesn’t move the needle.
Imagine you could skip the agency fluff, get a fast‑turnaround video that speaks directly to the pain points of a dev‑lead, and then plug it into a repeatable system that scales. That’s the sweet spot we aim for at Forgeclips – a structured, framework‑first approach that turns video from a one‑off expense into a growth engine.
So, how do you get from “I need a video” to “my video is driving qualified leads every week”? First, start with a crystal‑clear purpose: is the video meant to demo a feature, explain a pricing model, or showcase a customer success story? Next, map the viewer’s journey – from the first 5 seconds of hook to the final call‑to‑action. Finally, choose tools that let you iterate quickly without the agency price tag.
Once the video is live, the next challenge is getting it in front of the right eyes. That’s where smart social‑media automation can amplify your reach without adding another headcount. A great example is the guide from RebelGrowth on picking and setting up AI‑driven tools for social promotion – it’s a natural next step after you’ve built your video asset.
Here’s a quick actionable checklist to get you moving today:
• Define the video’s core objective (demo, testimonial, brand story). • Script the first 10 seconds with a hook that mirrors the prospect’s biggest frustration. • Choose a lightweight creation platform that lets you edit in minutes. • Upload to your landing page, email sequence, and product dashboard. • Set up an AI social‑media scheduler to auto‑share and retarget.
By treating video as a repeatable, data‑driven channel rather than a one‑off project, you’ll start seeing measurable lift in sign‑ups, demos booked, and churn reduction. It’s not magic – it’s a disciplined, human‑first process that we’ve refined for dozens of SaaS teams.
Ready to put this into practice? Grab the internal framework, choose the right automation partner, and watch your video marketing become a predictable growth lever.
TL;DR
If you’re a SaaS founder or product manager tired of pricey agency videos that never convert, this video marketing guide shows how to create fast, high‑quality demos and scale distribution with simple automation.
Follow our structured checklist, pick the right tools, and turn each video into a repeatable growth lever that drives sign‑ups, demos, and lower churn without adding headcount.
Direct Answer
Here’s the short answer: a solid video marketing guide gives you a purpose‑driven script, a quick‑turn production workflow, and a repeatable distribution loop that turns a single video into a steady stream of qualified leads.
First, define the exact goal—demo a feature, explain pricing, or showcase a use case. Then nail the first ten seconds with a hook that mirrors the prospect’s biggest frustration; you’ll see higher watch‑through rates almost instantly.
Watch the quick walkthrough below; it shows exactly how we strip out the fluff and land a crisp demo in under ten minutes.
After the video lives on your landing page, automate the push to the channels your audience frequents. A light‑weight scheduler can repost the clip, add captions, and trigger retargeting without you lifting a finger.
The result? More demos booked, lower churn, and a video asset that pays for itself month after month. Keep measuring click‑through and conversion metrics, tweak the hook, and let the system run.
Step 1: Define Your Video Marketing Goal
Ever sit down to sketch a video and wonder, “What on earth am I trying to achieve?” You’re not alone. Most SaaS founders start with a cool demo idea, then get lost in the edit suite, hoping the magic will happen. The truth is, without a crystal‑clear goal, the video becomes background noise.
First thing we do is ask yourself: which part of the funnel are you trying to move? Are you chasing awareness – a quick 30‑second intro that gets a prospect’s ears perked up? Or are you deep in the consideration stage, needing a detailed product walkthrough that answers the “how does it work?” question? Maybe you’re at the decision point and want a short, punchy testimonial that nudges a lead to click “Start Free Trial.” Pinpoint the stage, and the rest of the process falls into place.
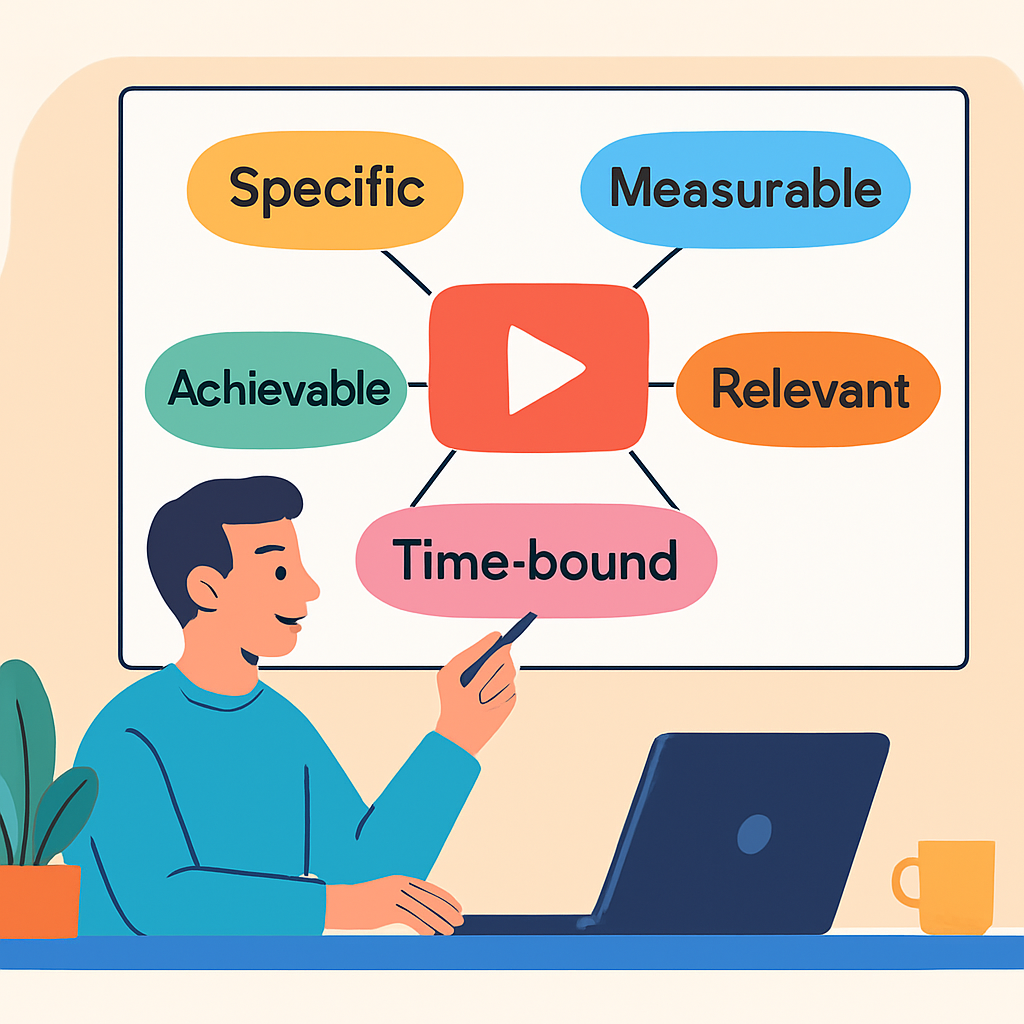
Turn a vague idea into a SMART goal
SMART goals are the secret sauce. Instead of saying, “I want more sign‑ups,” try: “Generate 150 qualified demo requests in the next 30 days from visitors who watch the new feature‑demo video.” That gives you a number, a timeline, and a clear metric to track.
Here’s a quick checklist you can copy‑paste into your notes:
Specific: What exact action do you want viewers to take?
Measurable: Which KPI will tell you you’ve succeeded?
Achievable: Is the target realistic given your traffic volume?
Relevant: Does the goal tie back to a bigger business objective?
Time‑bound: When will you evaluate the results?
When you write it down, you’ll notice the goal becomes less of a wish and more of a roadmap.
Real‑world examples that hit the mark
Take a SaaS startup that just launched a new API integration. Their aim wasn’t just “more users”; they wanted developers to spin up a proof‑of‑concept within a week. Their video goal was: “Increase the number of developers who complete the integration tutorial from 20 % to 45 % in 45 days.” By embedding the tutorial video on the docs page and tracking completion rates, they hit 48 % – a solid win.
Another example: a B2B analytics tool wanted to boost paid‑plan upgrades. They set a goal of “Drive 200 extra upgrades in Q3 from viewers of the pricing‑explainer video.” They paired the video with a limited‑time discount code, and the upgrade count rose by 12 % – exactly the lift they were targeting.
These stories show the power of aligning the video’s purpose with a tangible business outcome.
Expert tip: tie the goal to a downstream metric
Don’t stop at “views” or “watch time.” Connect the video to the metric that truly matters for your SaaS business – MRR growth, churn reduction, or support ticket deflection. For instance, if you’re aiming to cut support tickets, your goal could read, “Reduce onboarding‑related tickets by 30 % in the next two months by adding a concise onboarding video.”
In our experience, teams that map the video goal to a downstream metric can prove ROI in a single reporting cycle, which keeps leadership buying into the process.
Actionable steps to lock down your goal today
Open a new document titled “Video Goal – [Feature/Topic].”
Identify the funnel stage you’re targeting.
Draft a SMART statement using the checklist above.
Choose a single KPI (e.g., demo requests, sign‑ups, ticket volume).
Set a 30‑day or 60‑day evaluation window.
Share the goal with your product, marketing, and sales leads for alignment.
Once you’ve nailed the goal, the rest of the video marketing guide becomes a series of logical steps that feed directly into that objective.
Need a deeper dive into building a structured strategy around your goal? Check out our Video Marketing Strategy: A Practical Guide for 2026 – it walks you through turning a single objective into a full‑funnel playbook.
Step 2: Choose the Right Video Format
You've probably stared at a menu of video formats—explainer, demo, testimonial, social short—and thought, “Which one actually moves the needle for my SaaS?” You’re not alone. The right format is the bridge between the goal you just set and the conversion you’re chasing.
First thing’s first: let the goal dictate the format. If your SMART goal is to boost demo requests from developers, a hands‑on product demo video is the obvious choice. If you’re trying to spark brand awareness on TikTok, a 15‑second vertical snippet is the sweet spot. The format should feel like the natural vehicle for the action you want viewers to take.
Map the goal to a format
Grab a sticky note and write down the primary KPI you’re tracking—sign‑ups, MRR, churn reduction. Then ask yourself:
Do I need to explain a complex workflow? → Explainer (animated or live‑action).
Do I want to showcase a new feature in the product UI? → Demo (screen‑recorded walkthrough).
Am I leveraging happy customers to build trust? → Testimonial or case‑study.
Is my audience scrolling fast on mobile? → Short‑form vertical (Reels, Shorts).
That quick match‑up saves you from a costly “one‑size‑fits‑all” production that never resonates.
Common SaaS formats and when they shine
Format
Ideal Use
Key Considerations
Explainer video
Introduce a new concept or product tier
Keep under 2 minutes, use clear visuals, add captions for mute viewers
Demo video
Show step‑by‑step feature usage
Screen‑recorded, highlight UI elements, end with a strong CTA
Testimonial
Build trust with real‑world results
Short (30‑60 s), authentic voice, include a metric if possible
Social short
Boost awareness on TikTok, Reels, Shorts
Vertical, hook in first 2 seconds, use on‑screen text
Notice how each row pairs a format with a concrete purpose? That’s the decision‑making shortcut you need when time is tight.
So, what should you do next? Take the format you’ve matched to your goal and run a quick feasibility check.
Feasibility checklist
1. Production time. Can you put together a demo in under an hour using a screen‑capture tool? If not, consider a simpler explainer with static graphics.
2. Distribution channel. Are you planning to host it on your landing page, in an email, or on a social feed? Different platforms have different specs—YouTube prefers 16:9, Instagram Reels demand vertical.
3. Resources. Do you have a voice‑over talent on hand, or will you use on‑screen captions? Captioning is a must—studies show 80 % of mobile viewers watch without sound.
4. Analytics. Choose a player that lets you tag clicks and watch‑through rates. That way you can tie the video back to the downstream metric you set in Step 1.
When you tick all the boxes, you’ve got a format that not only looks good but also feeds your KPI.
Here’s a real‑world snapshot: a SaaS startup needed to educate developers on a new API. They opted for a concise demo video, kept it under two minutes, added on‑screen code snippets, and embedded it in the docs hub. Within 30 days, API sign‑ups jumped 42 %—a direct line from format to result.
If you’re still unsure which format to pick, the Cloudinary guide on marketing video types breaks down each option with examples you can map to your own funnel stage.
And when it comes to actually recording a product demo, the Vimeo blog post on software video demos offers a step‑by‑step workflow that fits right into the “quick‑turnaround” philosophy we champion at Forgeclips.
Bottom line: the format isn’t a decorative choice; it’s the engine that turns your video marketing goal into measurable lift. Pick the one that aligns with your KPI, run the feasibility checklist, and you’ll be one step closer to a video that actually converts.
Step 3: Build a Structured Production Framework
Okay, you’ve nailed the goal and picked a format. The next question most founders ask is, “How do I keep this from turning into a chaotic shoot‑and‑hope?” The answer is a framework – a repeatable skeleton that tells everyone exactly what to do before the camera even rolls.
Why a framework matters
Think about the last time you tried to build a piece of furniture without the instruction manual. You probably ended up with a few extra screws and a wobbling shelf. Video production is the same thing. Without a clear plan you waste time, money, and end up with a video that doesn’t speak to the KPI you set in Step 1.
In our experience, teams that map out the production flow can cut launch time by up to 40 %. That’s not magic – it’s simply removing guesswork.
Three pillars of a production framework
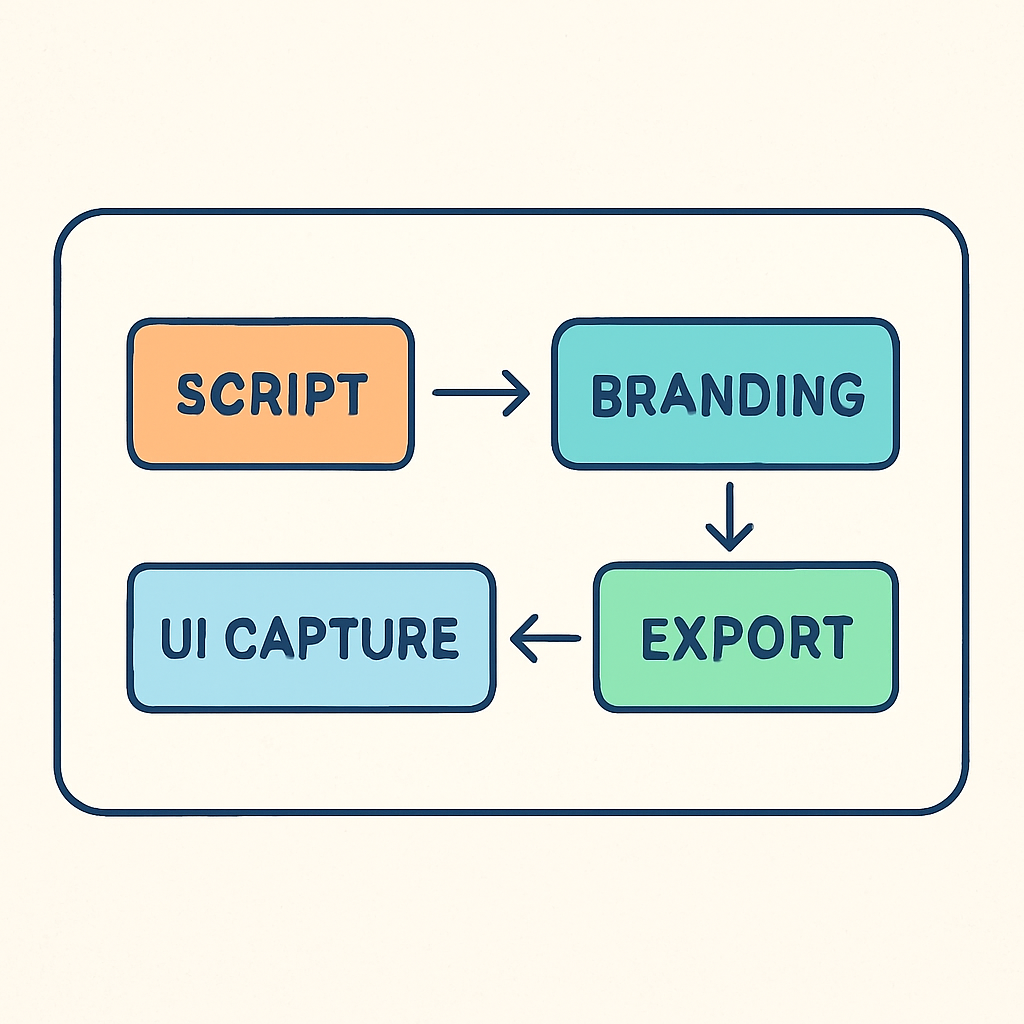
We break a solid framework into three layers: Strategy, Creative Brief, and Execution Checklist. Each layer builds on the previous one, so if you skip one, the whole house shakes.
1. Strategy layer
Start with the "why" you already clarified. Write a one‑sentence mission statement for the video, e.g., “Show developers how to integrate our API in under two minutes so they book a trial.” Then attach the primary KPI (demo requests) and the distribution channel (product docs hub). This tiny sheet becomes the north‑star for every decision that follows.
2. Creative brief
The brief is the bridge between business and production. Include:
Core message: The exact promise you’re making.
Tone & style: Casual, tech‑savvy, or enterprise‑formal – whatever matches your audience.
Length & format specs: 90‑second vertical for LinkedIn ads, 2‑minute landscape for the docs page.
When you hand this to the person filming, they know exactly what to capture – no wandering around the office looking for “good shots.”
3. Execution checklist
Finally, turn the brief into a day‑of‑shoot checklist. Here’s a template that works for most SaaS founders:
Confirm video objective and KPI with the product lead.
Gather all assets: brand fonts, colour palette, UI screenshots, and any demo data.
Run a 5‑minute script read‑through with the on‑camera talent (often it’s you).
Record a quick test clip on the intended device (phone, screen‑capture tool, or webcam) to verify lighting and audio.
Capture primary footage following the scene order in the brief.
Immediately tag each clip with its intended use (landing‑page, ad, short‑form).
Upload to a shared folder with version naming (e.g., demo_v1_raw.mp4).
Run a 2‑minute review with the stakeholder and note any cut‑points.
Export final versions in required specs and log the URLs in your content‑ops spreadsheet.
Because the checklist lives in a single document, you can hand it off to a junior designer or a freelance editor and still get consistent results.
Real‑world example: a developer‑centric API demo
A SaaS startup we helped needed a video that would sit inside their API docs. They followed the three‑pillar framework:
Strategy: “Increase completed API‑integration tutorials from 20 % to 45 % in 45 days.” KPI – tutorial completion rate.
Creative brief: 90‑second screen‑recorded walkthrough, captions for mute viewers, and a CTA linking to a sandbox environment.
Execution checklist: they recorded the demo on a Mac, tagged each segment (auth flow, data fetch, error handling), and exported two versions – one for the docs page, one for a LinkedIn ad.
The result? Within a month, tutorial completions jumped to 48 % and support tickets related to onboarding dropped 30 %.
Tips to keep the framework lean
1. Keep the brief under one page. If it spills onto a second page, you’re probably over‑engineering.
2. Use templates. Save the checklist as a Google Sheet and duplicate for each new video – you’ll never reinvent the wheel.
3. Tag assets from day one. A simple naming convention (e.g., feature‑demo_v2_1080p.mp4) makes it easy to pull clips into short‑form posts later.
4. Involve the distribution team early. If you know the video will go into a drip email, add a 15‑second “email‑friendly” cut in the checklist.
Putting it all together
When the framework is live, you’ve essentially turned a chaotic production into a repeatable assembly line. The next time you need a new feature demo, you just swap out the UI screenshots, update the KPI, and the rest of the process stays the same.
And when you’re ready to push those videos out at scale, the AI‑driven social‑media automation guide from RebelGrowth can help you schedule, retarget, and measure performance without hiring a full‑time media team. It’s a natural next step after you’ve built a solid production framework.
Step 4: Distribute and Optimize for SEO
So you’ve got a polished demo or explainer sitting in your cloud folder. Great. The next question most founders ask is, “Now what?” The answer is simple: get it in front of the right eyes, and make sure search engines can find it too.
Why multi‑channel distribution matters
Creating a video is only half the battle. If you upload it once and walk away, you’re leaving a lot of potential traffic on the table. A multi‑channel distribution strategy lets you stretch the life of a single piece of content across LinkedIn, Twitter, email newsletters, and even your product docs. The idea isn’t to copy‑paste the same file everywhere, but to re‑package the core message in formats that feel native to each platform.
Imagine you wrote a 2‑minute feature demo. Turn the first 30 seconds into a snappy Reel for Instagram, pull out a key screenshot for a LinkedIn carousel, and embed the full video on your pricing page. Each touchpoint nudges a different slice of your audience toward the same goal.
Step‑by‑step distribution checklist
1. Map your channels. List every place your target persona hangs out – developer forums, product‑hunt newsletters, YouTube, or the SaaS community Slack. Prioritize 2‑3 that align with your goal.
2. Tailor the copy. Swap out jargon for platform‑specific tone. A LinkedIn post can be a bit more formal, while TikTok loves a cheeky hook.
3. Schedule, don’t flood. Spread out posts over a week. This prevents content fatigue and gives each version room to breathe in the feed.
4. Tag and track. Add UTM parameters to every link so you can see which channel drives the most demo requests or sign‑ups.
Does this feel like a lot? It’s actually a handful of actions that you can lock into a simple Google Sheet template. Once the sheet is ready, duplicate it for every new video and you’ll never reinvent the wheel.
Optimizing for video SEO
Even the best distribution plan stalls if search engines can’t understand your video. That’s where video SEO comes in. Think of it as the roadmap that guides Google, YouTube, and Bing to your content.
Start with the basics: give your video a keyword‑rich title that mirrors the search intent of a SaaS founder looking for a solution. Keep it under 60 characters so it isn’t truncated in SERPs.
Next, write a detailed description—aim for at least 200 words. Sprinkle the primary keyword naturally, add a concise summary, and include a call‑to‑action that points back to your landing page. According to AIOSEO’s video SEO guide, a thorough description boosts click‑through rates and gives search crawlers more context.
Don’t forget tags. Mix broad terms like “video marketing guide” with specific phrases such as “SaaS feature demo tutorial.” Ten to twelve well‑chosen tags are enough; stuffing them will hurt more than help.
Transcripts are another hidden gem. Upload a plain‑text transcript so Google can index every spoken word. This not only improves rankings but also makes your content accessible to viewers who watch without sound.
Finally, add schema markup. If you’re comfortable editing a bit of code, insert a VideoObject schema on the page where the video lives. It tells search engines the title, description, thumbnail URL, upload date, and duration—all the ingredients for a rich snippet.
Quick SEO audit checklist
Title includes primary keyword and stays < 60 characters.
Description ≥ 200 words, naturally includes secondary keywords.
10‑12 relevant tags, no keyword stuffing.
Transcript uploaded and linked.
VideoObject schema implemented.
UTM parameters added to every distribution link.
Run through this list after each upload and you’ll catch the low‑hanging SEO wins before they slip through the cracks.
Putting it all together
Here’s a typical workflow for a SaaS founder in 2026:
Upload the finished demo to your preferred host (YouTube or self‑hosted).
Fill out the SEO checklist – title, description, tags, transcript, schema.
Copy the video URL into your distribution sheet.
Generate platform‑specific copy and schedule posts across LinkedIn, Twitter, and a weekly product newsletter.
Monitor UTM data in Google Analytics for the next 30 days and double down on the channel that delivers the most qualified demo requests.
That loop repeats for every new piece of video content, turning one asset into a steady stream of traffic, leads, and ultimately, revenue.
Remember, the magic isn’t in the tool you use; it’s in the habit of distributing smarter and optimizing every step. Once you embed this routine into your growth engine, you’ll see your video marketing guide become a predictable lever rather than a shot in the dark.
Step 5: Measure ROI and Iterate
Alright, your video is live, the UTM tags are in place, and you’ve started to see some traffic. The real question now is – is it actually moving the needle? That’s where measuring ROI becomes more than a checkbox; it’s the feedback loop that tells you what to keep, tweak, or scrap.
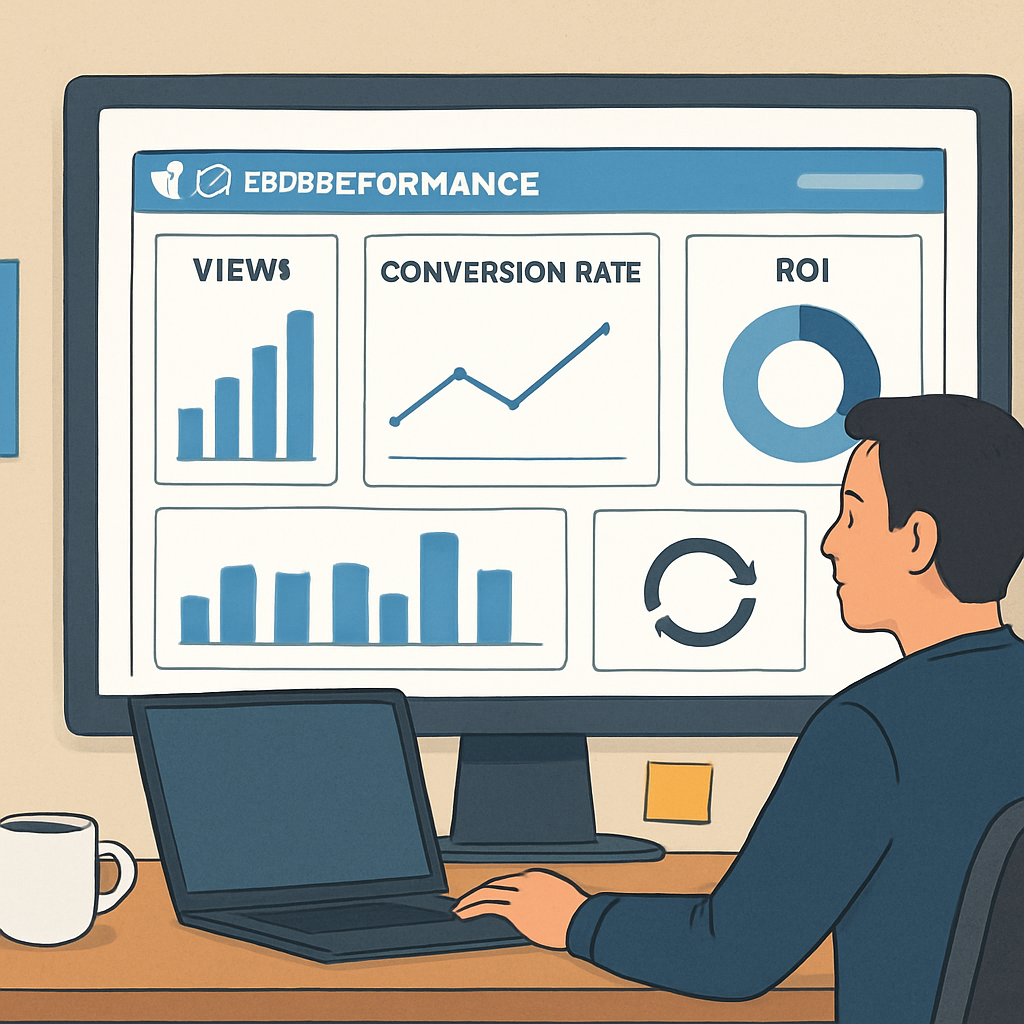
Start with the numbers that matter
First, write down the KPI you tied to your video in Step 1. It might be demo requests, sign‑ups, or a reduction in support tickets. Anything else is just noise.
Then pull these core metrics from your analytics stack:
Views & play rate – do people even click play?
Average view duration – are they watching past the hook?
Conversion actions – clicks on the CTA, form fills, or link clicks that lead to a qualified lead.
Cost per view – total spend divided by total views.
When you line those up against your original goal, you can see the gap in plain sight.
Calculate a simple ROI
The math doesn’t have to be rocket science. Use the classic formula:
ROI = (Revenue attributed to video – Total video spend) / Total video spend × 100%
Revenue attribution can be a direct sale, a qualified demo request that later converts, or the lifetime value of a new customer. If you’re unsure, start with the first dollar‑close you can prove and iterate from there.
For a quick reference on how other marketers break down the numbers, check out this guide from Firework on measuring video ROI. It walks you through the same steps with real‑world screenshots.
Layer in deeper insights
Raw numbers are useful, but they don’t tell you why a viewer dropped off at the 45‑second mark or which channel delivered the highest‑quality leads. That’s where secondary metrics shine:
Traffic source breakdown – see if LinkedIn, email, or organic search is driving the best viewers.
Engagement rate – likes, comments, and shares can be early indicators of trust.
Lead quality score – track conversion rates downstream (MQL to SQL) for each video source.
ReportDash does a solid job of pulling these data points into one dashboard, so you don’t have to chase them across three different tools. Their video marketing metrics guide shows how to set up a unified view.
Turn data into action
Now that you have the numbers, it’s time to iterate. Ask yourself:
Is the play rate below 40%? Try a stronger thumbnail or move the video higher on the page.
Is average view duration under 30 seconds for a 2‑minute demo? Trim the intro, add captions, or front‑load the value proposition.
Are conversions coming from a specific channel? Double down on that channel’s ad spend and create a short‑form cut tailored to its format.
Every tweak should be tested with a clear hypothesis and an A/B framework. Change one variable – thumbnail, CTA wording, video length – and run it for at least a week before judging the impact.
Document the loop
Keep a living spreadsheet or a simple Notion page that captures:
Goal and KPI.
Key metrics before the change.
What you changed and why.
Results after the test period.
Next steps.
When the data is visible, it’s easier to get buy‑in from product, sales, and leadership. It also turns the “video marketing guide” from a one‑off checklist into a repeatable growth engine.
Remember, the habit of measuring and iterating is where the magic lives. A video that once generated five demo requests a week can become a ten‑request machine once you optimize the hook, the landing‑page placement, and the follow‑up email sequence.
And if you ever feel stuck, think of the process like sprint retrospectives you already run for code. You gather data, celebrate what worked, flag what didn’t, and plan the next improvement. Apply that same cadence to every video, and you’ll watch ROI climb over time.
FAQ
What exactly is a video marketing guide and why should a SaaS founder care?
Think of a video marketing guide as a playbook that walks you from the first spark of an idea to a live video that actually moves a metric—whether that’s demo requests, sign‑ups, or churn reduction. For a founder juggling product sprints and fundraising, having a repeatable framework means you won’t waste weeks on a video that never converts. It turns a one‑off effort into a growth engine you can scale.
How do I decide which video format fits my funnel stage?
Start with the KPI you set in Step 1. If you need awareness, a short, hook‑heavy Reel or TikTok‑style vertical works best. For consideration, an explainer or demo that walks through the UI helps prospects evaluate fit. When you’re chasing a decision, a concise testimonial or pricing‑explainer with a clear CTA nudges the lead over the finish line. Match the format to the action you want the viewer to take.
Can I build a video marketing guide without hiring a production agency?
Absolutely. The whole point of the guide is to replace the “agency drain” with a structured, in‑house process. Use a lightweight screen‑capture tool, a template‑driven editor, and a simple checklist to keep every step accountable. In our experience, founders who follow a repeatable framework can launch a polished demo in under an hour—no need for a multi‑week shoot.
What are the key metrics I should track after the video goes live?
First, verify the KPI you defined—demo requests, sign‑ups, or ticket deflection. Then layer on view‑based metrics: play rate (how many people actually click play), average view duration (are they watching past the hook?), and click‑through rate on the CTA button. Pair those with cost‑per‑view if you’re paying for distribution. Together they give you a clear picture of whether the video is delivering ROI.
How often should I iterate on my video content?
Treat it like a sprint retrospective. Every 30‑45 days pull the latest analytics, note what moved the needle and what stalled, and plan one concrete tweak—maybe a new thumbnail, a tighter intro, or a different CTA copy. Run that change as an A/B test for at least a week before judging impact. The habit of regular, data‑driven tweaks is where the magic lives.
Is it worth embedding video on my product documentation?
Yes, especially for technical audiences. A short demo tucked into a docs page can boost tutorial completion rates and cut support tickets. We’ve seen teams lift API sign‑up completion from 20 % to nearly 50 % simply by adding a 90‑second walkthrough with captions. The key is to keep it skimmable—clear headings, timestamps, and a visible CTA that points back to a free‑trial or sandbox.
What’s the fastest way to get my video in front of the right eyes?
Leverage an AI‑driven social‑media scheduler to auto‑share the video across LinkedIn, Twitter, and a weekly product newsletter. Tag each post with UTM parameters so you can trace which channel drives the highest‑quality leads. Then repurpose the first 15 seconds into a vertical short for TikTok or Reels. A multi‑channel, repurposed approach lets one asset fuel several traffic streams without extra production effort.
Conclusion & Next Steps
You've made it to the end of this video marketing guide, and if you’re feeling a mix of relief and a tiny spark of doubt, that’s exactly where progress lives.
Remember the core loop: set a SMART goal, pick the format that serves that goal, lock in a lean production framework, push the video out everywhere, then measure and tweak. One concrete tweak a week—maybe a new thumbnail, a tighter intro, or a sharper CTA—keeps the momentum rolling.
So, what should you do next? Grab a sticky note, write the single KPI you care about most, and schedule a 30‑minute sprint this afternoon to draft the next A/B test. Run the test for at least seven days, then compare the numbers against your baseline.
In our experience, the habit of treating each video like a mini‑experiment pays off faster than waiting for a perfect, all‑or‑nothing launch. It turns the “agency drain” into a predictable growth lever.
Finally, bookmark this guide, revisit the checklist whenever you start a new video, and keep a simple log of what you changed and what happened. The next time you hit a roadblock, you’ll have a proven path to follow.
Ready to put the framework into action? The first step is just one sentence: define the next video’s goal and put it on your calendar. You’ve got the tools, the process, and the mindset—now go make that video work for you.